0
$\begingroup$

I'm having trouble welding the inner corners of my material. Welding material is sometimes deposited on either one side or both sides, but never really connecting the two parts.

Side/flat welds work fine:
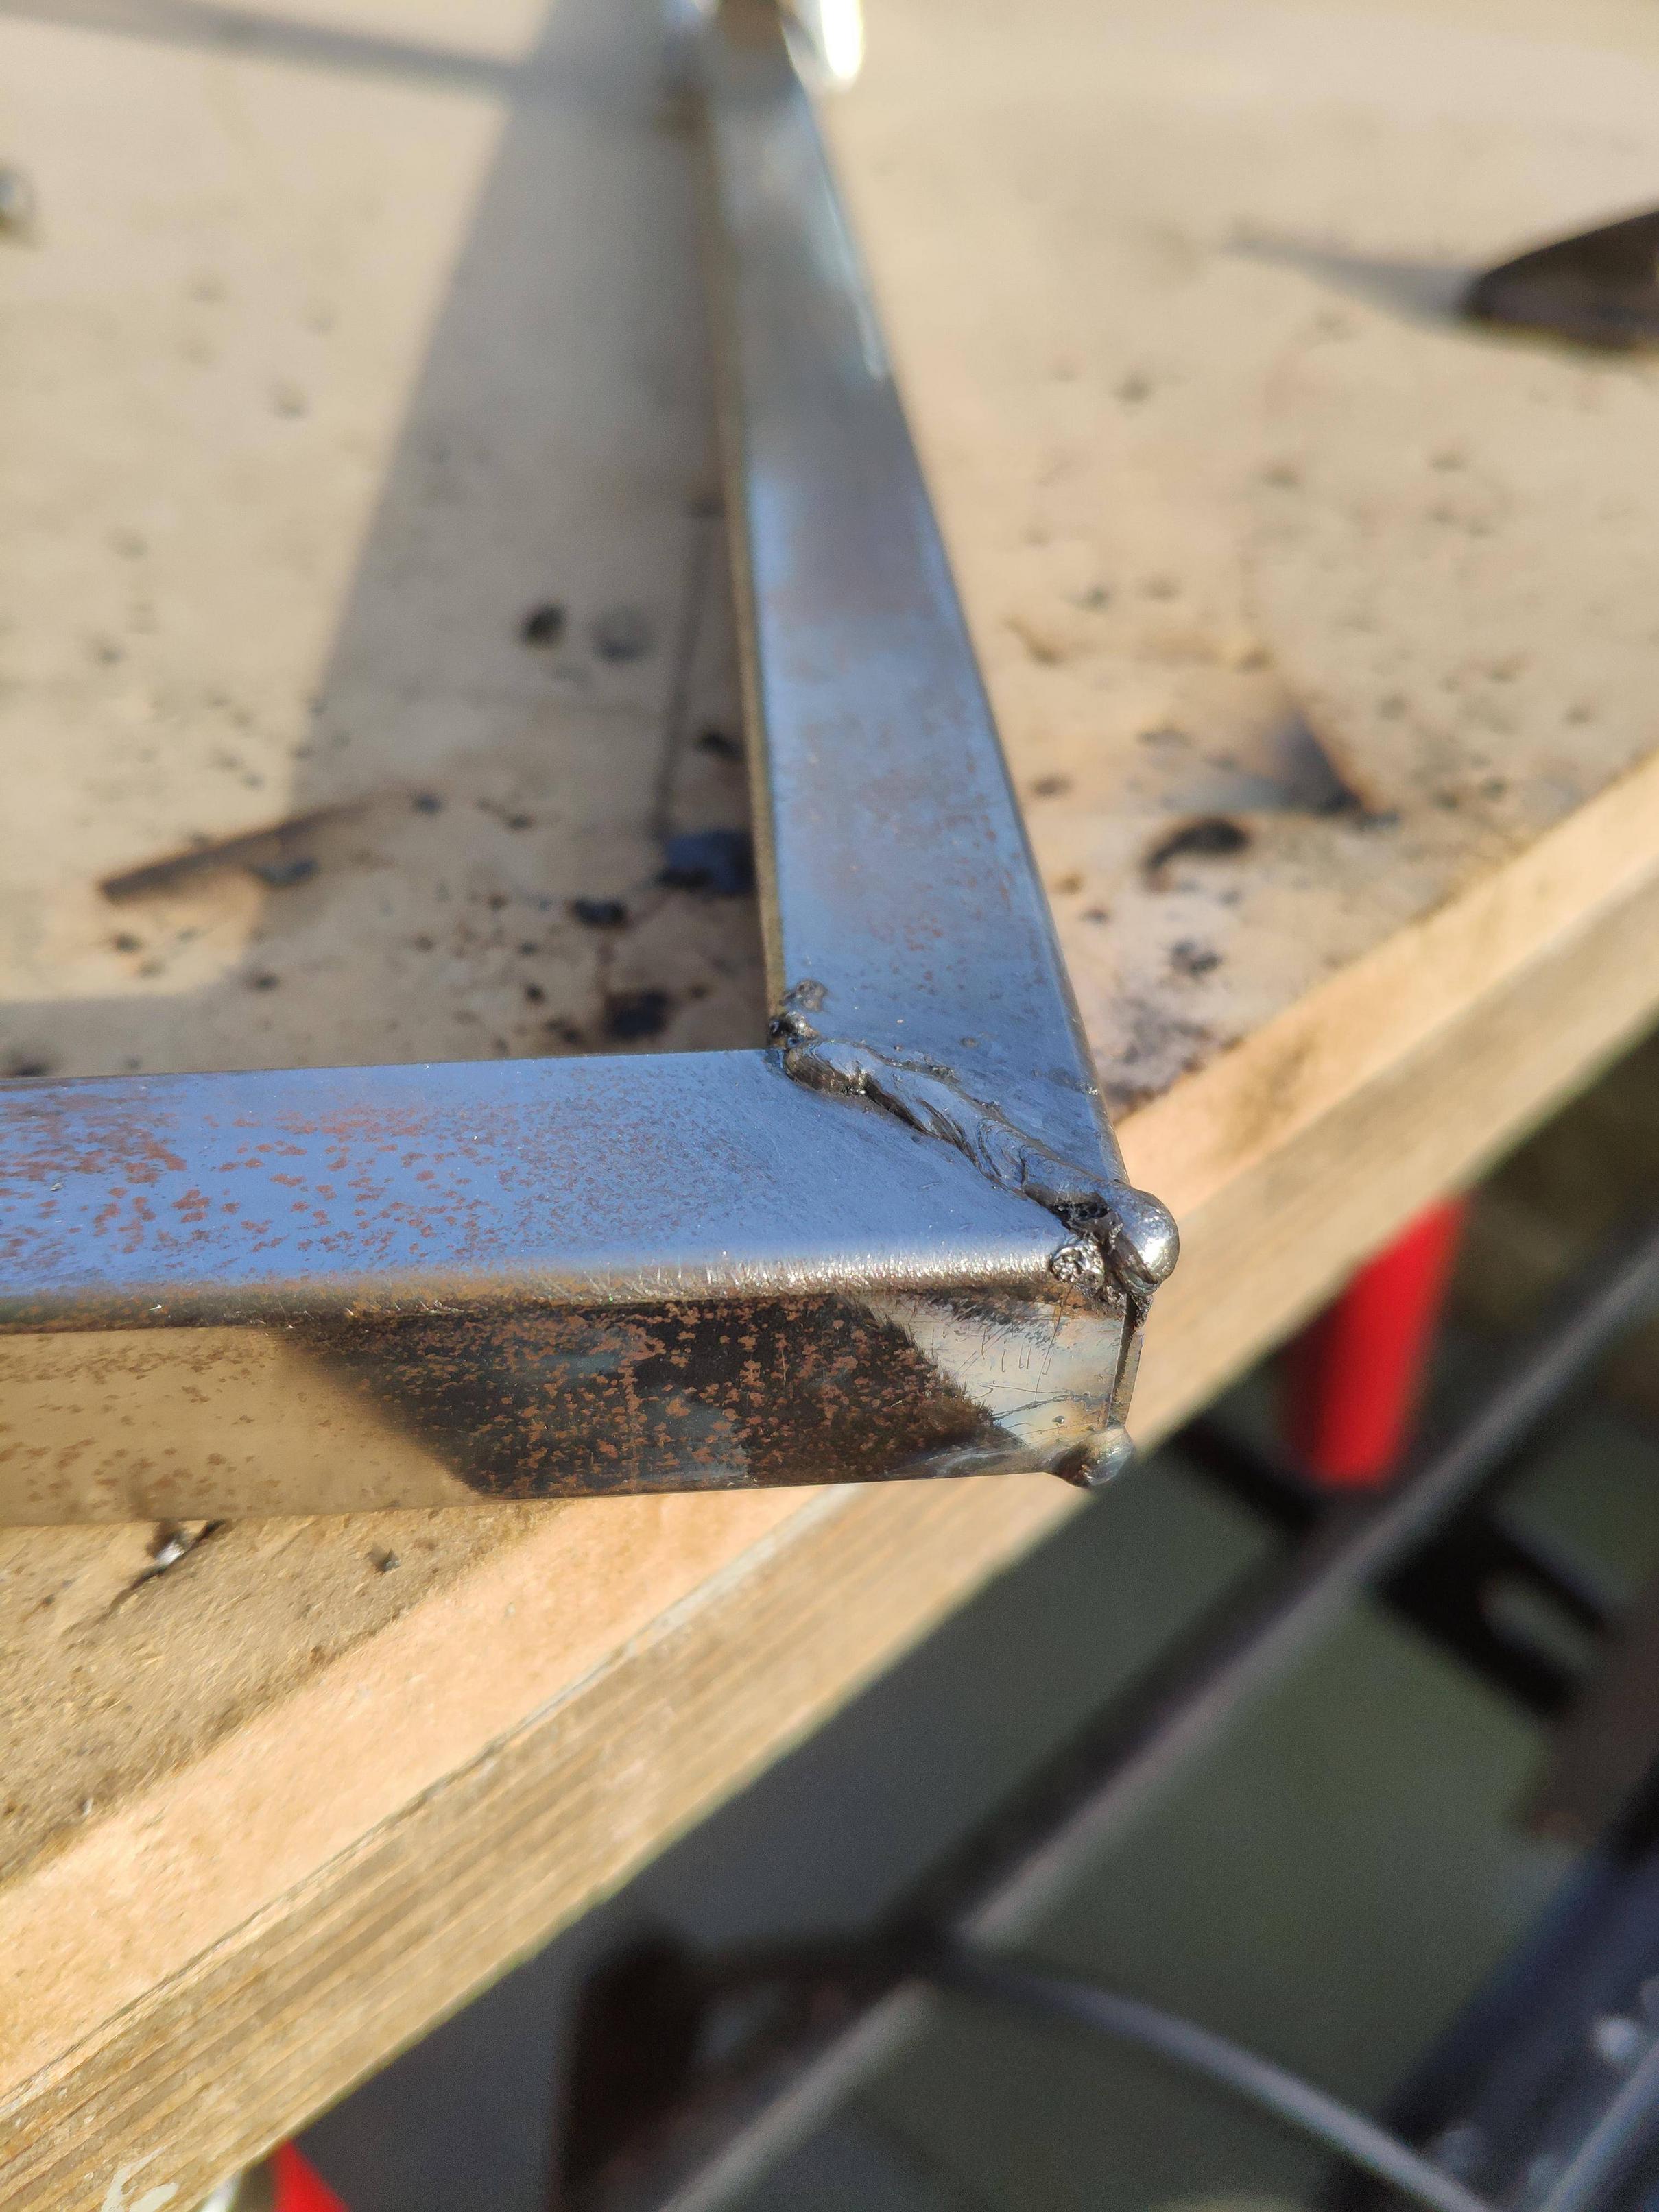
photo

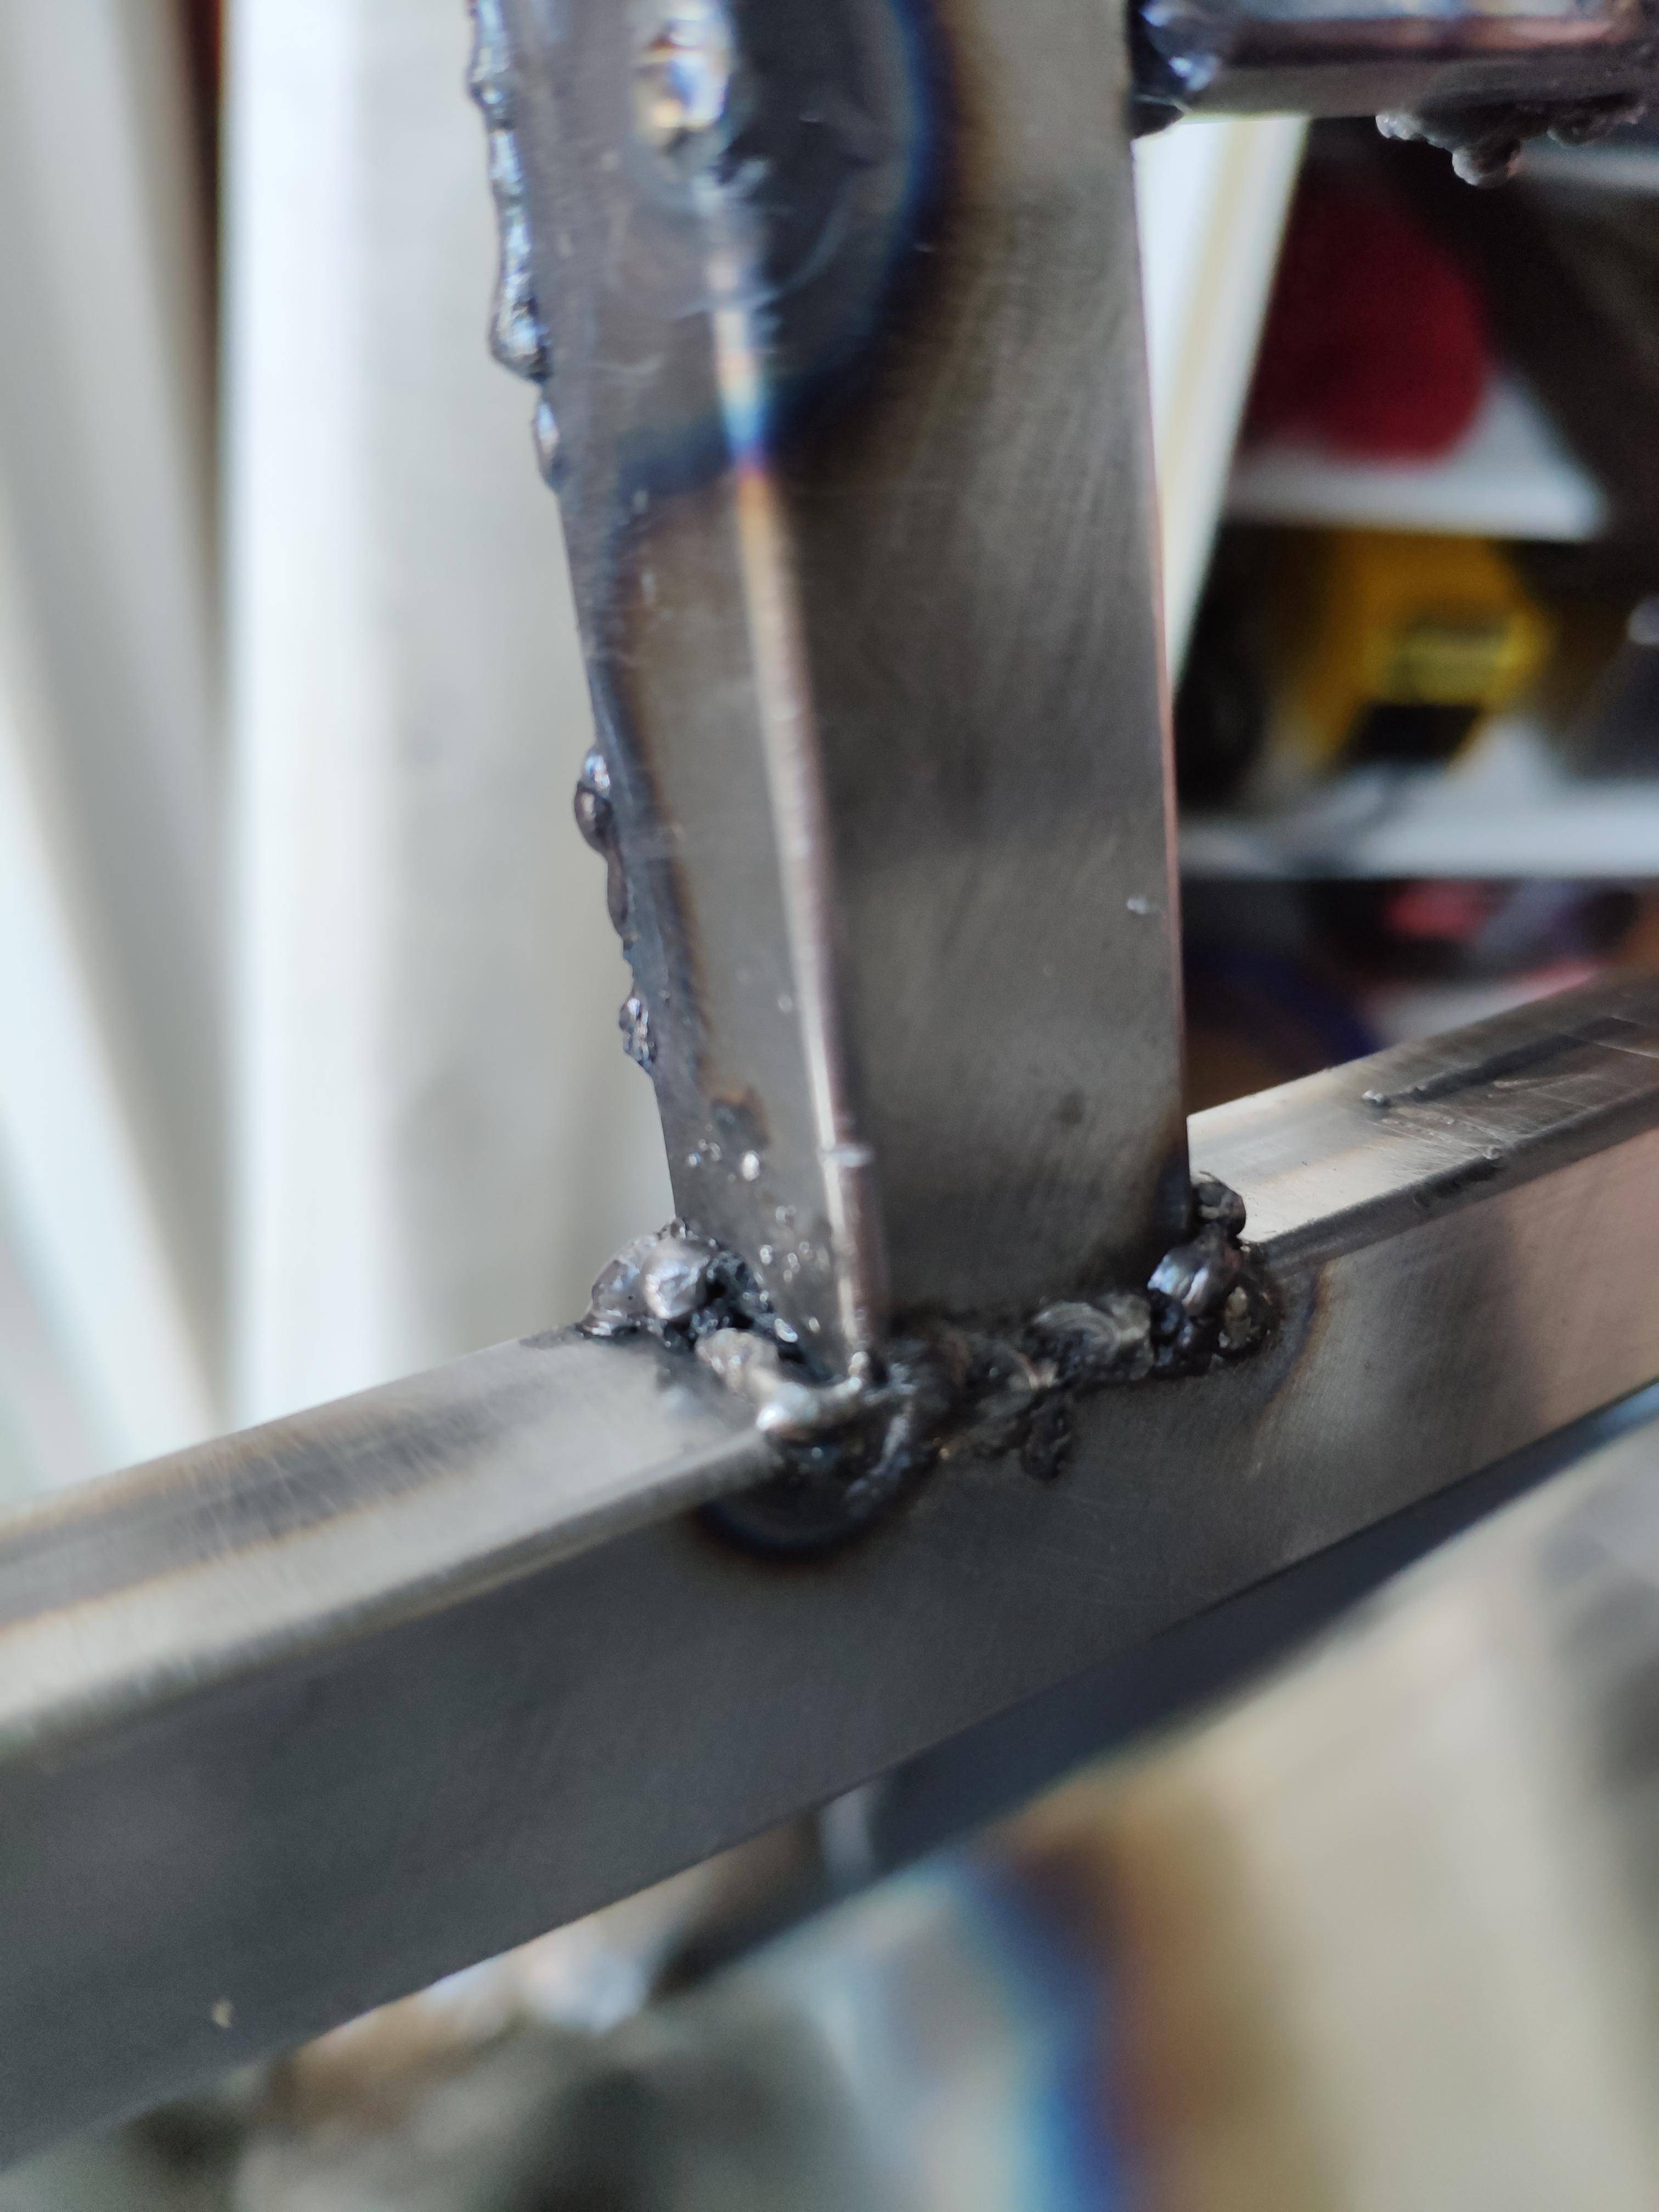
But those pesky inner corners don't:

photo

The material I'm using is 1mm thick 16x16mm square steel tubing. Welding settings are 20 Amps DC electrode positive and welding electrode is 1.6mm steel.

Am I doing something wrong? Is there a trick to this I'm missing?

$\endgroup$
4
  • $\begingroup$ Even for thin material as shown, 20 A seems very low ; But I usually had 3 to 4 mm electrodes. $\endgroup$ Commented Feb 23, 2019 at 21:09
  • $\begingroup$ I found 6mm electrodes do a very good run on 1/2” plate with 120A DC... $\endgroup$
    – Solar Mike
    Commented Feb 23, 2019 at 21:37
  • $\begingroup$ @Solar Mike that will melt big holes in my hollow steel pipe faster than you can say "too much heat" $\endgroup$
    – Gelunox
    Commented Feb 24, 2019 at 11:41
  • $\begingroup$ You can blow holes in anything.... $\endgroup$
    – Solar Mike
    Commented Feb 24, 2019 at 11:44

3 Answers 3

3
$\begingroup$

It's hard to give a definitive answer for welding questions like this because there are so many variables, but here are some possible things to try:

Technique

  • From the photos it looks like you aren't able to maintain an arc on the inside corner. Likely you need to decrease your arc length (if using stick/SMAW) or wire feed speed (if using MIG/GMAW) and/or increase your 'heat' (current or voltage depending on the type of power supply you are using.) Until you have a stable arc, nothing else will matter much.
  • 20 amps is a very low amount of current for welding. Your concern about melting through is obviously valid on such thin material, but there are technique options to help. One option is to try weaving (aka transverse oscillation) from side to side as you proceed up the weld. This gives the heat a little time to distribute in each side while also ensuring that you get good fusion on both sides. For many types of weld this technique is frowned upon, but for this type of joint it will be fine. The other major technique change you can try here is traveling much faster across the weld. The photo of your side weld shows an excessive amount of weld metal deposited. While this isn't necessarily a problem, it means you are putting in more heat than you need to, making the risk of burn-through bigger. It's also correlated with a lack of good fusion. Running hotter and faster will likely produce a better weld all around this joint.
  • Make sure if you don't weave that your electrode is running straight down the center of the joint. If you are having trouble seeing, you may need a bright light or an adjustable shade welding hood.
  • Position the joint to be as favorable to a good weld as you can. If you were welding the inside corner in the orientation photographed, gravity will pull your weld pool from the vertical wall down on to the horizontal wall. If at all possible, rotate the assembly 45 degrees so that both tubes are at an equal 45 degree angle from the earth. This way gravity will help equally on both faces. The orientation of the joint makes such a big difference that in America structural welders aren't allowed to perform welds in a harder orientation than they have taken a qualification test on.

Joint Design

  • On a tube joint like this, consider if you can simply skip welding the harder faces. If you don't need the joint to be totally sealed, and can weld the other faces strong enough, then you save time and effort by skipping the harder welds. Typically the inside corner would be considered the easier face in a t joint, but if the faces are easier for you then do them.
  • If it's possible to add a steel backing inside of the joint, that will allow you to burn much hotter without worrying about burning through. A short slug of square bar or slightly smaller tube would be good candidates.
  • If you could add a T shaped gusset plate to the outside and weld to that instead, your welding situation would be much easier.
  • Tacking additional metal (scrap tube or plate) at the beginning and end of the joint gives you a place to start and stop your weld, which will help you move faster through the joint. These are called 'run-on' and 'run-off' tabs and are common in structural joints.

Equipment

  • Thin metals like this are easiest to weld with the TIG (GTAW) process. If you can get access to TIG equipment, try the weld with that and very little filler metal.
  • MIG will be the next easiest process. I can't tell for sure from the photo if you're attempting MIG or stick, but if it's stick you could try switching to MIG. Avoid self-shielded (flux core) wires as they are specifically designed for deeper penetration.
  • If you're using MIG, short circuit transfer is generally preferred for thin metals as it has limited penetration (and thus risk of burn-through.) 75% argon 25% CO2 will be best for that.
  • If you have access to a pulsed spray MIG machine, it will have settings to limit the amount of penetration which will control burn-through.
$\endgroup$
0
$\begingroup$

Practice...

I'm not the best welder, and there are a couple on here... But I think you just need a bit more practice and try to get the arc down at the bottom of the joint - it may be that you are just a "bit" too far away sometimes only a mm makes all the difference...

Take the arc closer and when it sounds like you're about to extinguish it stay about there... Also "pushing" the arc from side to side may help...

And I can't remember the times my instructor would mention "birds crap smoother than that"... :) No offence meant.

$\endgroup$
2
  • $\begingroup$ Practice , practice, practice. A good looking weld is usually a good weld. MIG is not as difficult as stick ; The first time I used MIG it looked good ( However real welders had set up the machine). While "bird crap" would be a good description of my occasional stick welds. I got better stick results with high power and pushing the electrode into the work , typically working with material 1/2 inch thick. $\endgroup$ Commented Feb 23, 2019 at 21:05
  • $\begingroup$ Practice, practice, like @Blacksmith37 says. The first time I did a stick weld, it looked pretty good, it helped that a pro setup the machine. I have a welder in my garage and after weeks of monkeying around I am just starting to get some welds that look better than bird crap (Thanks @SolarMike). Welding something as thin as 1mm is going to be a bear. Remember, DASH Distance, Angle, Speed and Heat. Varying one at time is tough but eventually, you'll get a combination that works for your project. $\endgroup$ Commented Feb 14 at 6:05
0
$\begingroup$

It's all about angles, try a main weld at around 45 degrees down the corner then have a weld on the bottom piece of metal that half laps over the original weld, follow that up with a weld on the top piece of metal which also half laps the original weld this one should be welded at around 30 degrees. I'm not the best welder but that's how I was taught and if you can work with angles then you should be fine, also don't go too fast or too slow, and try notice patterns like almost draw ticks or C's in your weld. EDIT: also tie what your welding together, for example weld ties at each corner and then it's just a case of filling in the gap.

$\endgroup$

Your Answer

By clicking “Post Your Answer”, you agree to our terms of service and acknowledge you have read our privacy policy.

Not the answer you're looking for? Browse other questions tagged or ask your own question.